JPG vs RAW – Image Noise Comparison
I don’t know how far this post will reach but it is still worth sharing in my opinion. With digital photography the philosophical argument regarding the ‘rendering options’ from the camera has become a relatively important consideration. Does the photographer shoot to JPG or RAW, or maybe both.
The negative is comparable to the composer’s score and the print to its performance. Each performance differs in subtle ways.
Ansel adams
Quick self history story: I have been working with Digital since it came out in one way or another and was an early adopter to digital SLR cameras. As a pro-hobby photographer my initial monetization of photography was really in the world of Stock images. This meant, big image files that were of high enough quality to be able to print REALLY big. So image ‘noise’ was a very important consideration for my final image development and hence still maintains as a primary focus for my image post production. One might ask why are you talking about image noise when comparing JPG to RAW and it is obviously because it is one of the largest areas of additional control when considering your medium to render.
Ok so the caveat is that since my web foot print is not large you are likely here because of an interest in the subject and you ‘found’ this article. The reality of course is that this subject matter is really only a concern for maybe 5% of all photographers. There are many, many professionals who shoot in JPG as the results are great and the workflow is reduced, considerably. This opinion article represents a small minority of photographers who want to preserve the ‘billboard’ sized printing capability or possibly just want full control over the image. Cameras today produce fantastic images quite capable of printing 12×18 images with great results from JPG. Phone cameras which are very capable really don’t lend themselves to editing RAW although there are RAW shooting modes in most prosumer level phones.
Short version of what is a JPG (JPEG) image
Your camera will capture the information for the image that you are making (RAW – information) and if processing that image to a JPG it will then consider the image based on its programing and what settings you have made and then will decide what it will discard from the image. The word discard here is key, the camera will throw away information from the image that you just made which will be gone. You will not be able to recover that information in anyway.
When you consider this, again, that information is deleted or thrown away. The JPG format creates spaces in the information that printers and computers are able to understand but the information that was there has been discarded. Take for example my new camera the Fuji X100V. A direct comparison of images that will be presented in this article are like this: JPG 12.2MB same image in raw 56.7MB.
Something to consider here as well is that when looking a my folder of say 20 images the ‘camera’ JPG images are between 8 and 16MB depending on what the camera decided to discard from that image. My RAW processed to JPG files are generally between 11 and 24MB so the computer conversion leaves more information in JPG and the actual RAW files are between 55 and 57MB. The greater variance between JPG image sizes is what I find most interesting but it relates to what the images are designed to delete when they compress.
The greater image size of course is huge in comparison and is one of the main arguments for not shooting in RAW:
If you are going to shoot RAW and you make a lot of photos, you are going to need stacks of hard drives to store all of your photos. Backup, Backup
My workflow literally leaves me needing to remove photos from my HD on a monthly or quarterly basis as I will run out of space if I don’t. No Joke. RAW images eat your hard drive space but they are almost 5x larger for a reason.
This is worth a highlight: if you take your image as a JPG from the camera into post production and start editing it. Saturation, Contrast, a little here and a little there. Save, open, save, etc… JPG edits are reducing the image quality and information each time you save the image. The software literally compresses the software new again for each save.
software is getting better but with a JPG you should work with a copy… but now you have two
This is true of any JPG editing that is done whether the image from the camera or the JPG that was created from your RAW file. All JPG edits are degrading the image quality.
Something that is worth mentioning is that although I process 95% of my images from RAW, I print and work in post with 100% of my images in JPG. I will sometimes work with TIFF but honestly most of the time, I print from JPG, I deliver clients JPG and I upload JPG images for stock. It is important to understand though that once my image is a JPG I am done with it. I might remove a blemish here and there but in general the image will not change once a JPG which allows me to avoid the continuous lossy compression effects that degrade the JPG image each time you edit it.
RAW – Workflow and ‘why’
Taking a RAW image into post production requires, for me anyway, a significantly longer process. Due to the large image sizes I am a ninja in my initial post production run and I delete any image that is not even remotely close to its intention. This does not mean that I dont experiment it just means that when those creative ventures do not yield quite the results I had intended that I learn from it and then bin it, delete.
Ok so my workflow is something that has kind of remained a bit stagnant for 10 or so years. The tools within the workflow have been updated but the process remains the same and this is largely due to the fact that I want to be able to make as clean an image as possible. My RAW editor has a built in noise engine which I feel is second to none and as a result some of the more ‘complete’ all in one solutions are not my go to for image processing. It is interesting but as a photographer I assume many others are the same in that when they have a process that works for them and they are familiar and comfortable with it becomes solidified.
My media manager has not been updated in some time and as a result no longer supports the new raw files but it is still workable and it will manage the JPG stock image requirements very well. Of course all of this is trivia… why bother with RAW.
Why render to RAW
Simple, Noise. Well and of course everything that I mentioned above but first off…
If you are not going to ever print an image larger than 8×10, JPG is totally fine. With pro level gear 12×18 from a JPG and you are fine, largely.
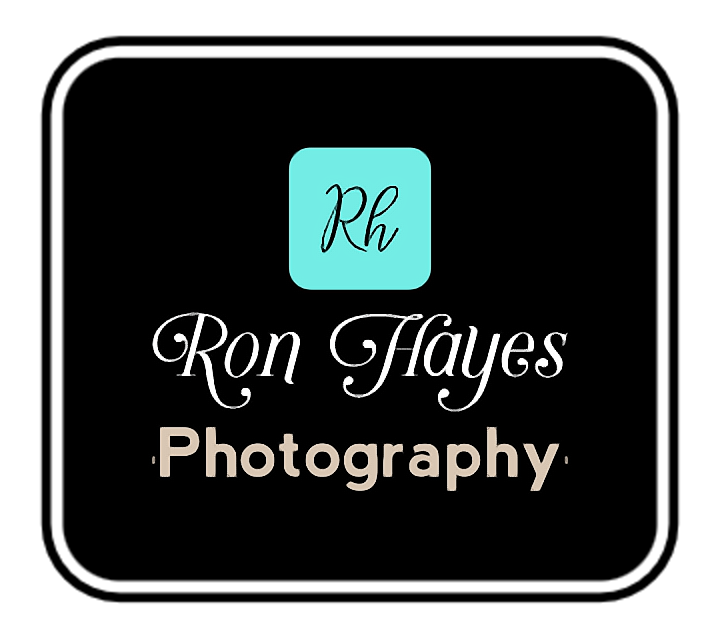
I am going to discuss the photos next and then add a gallery with comments below each image which will allow you to slide back and forth. The gallery will include the full image so that you know what we are looking at, then a 100% crop from the full image in PS, and a 300% crop. Why go into the image as far as 300%? Many photographers will crop into an image to isolate their subject. This is normal practice and when working from 26Mp you have space available, but, as you do you start to get into the realm of NOISE. The image we are going to work from is a sunset BW image taken in Hong Kong looking towards the airport.
Important note: All images are being selected for the website as FULL or Original and subsequently any noise that you are seeing is directly from the image and not web compression by the html or css rendering of the web page. Additionally all images are JPGs. The ‘camera’ JPG is identified and RAW file conversion is then shown but the final images that we are looking at are all JPG.
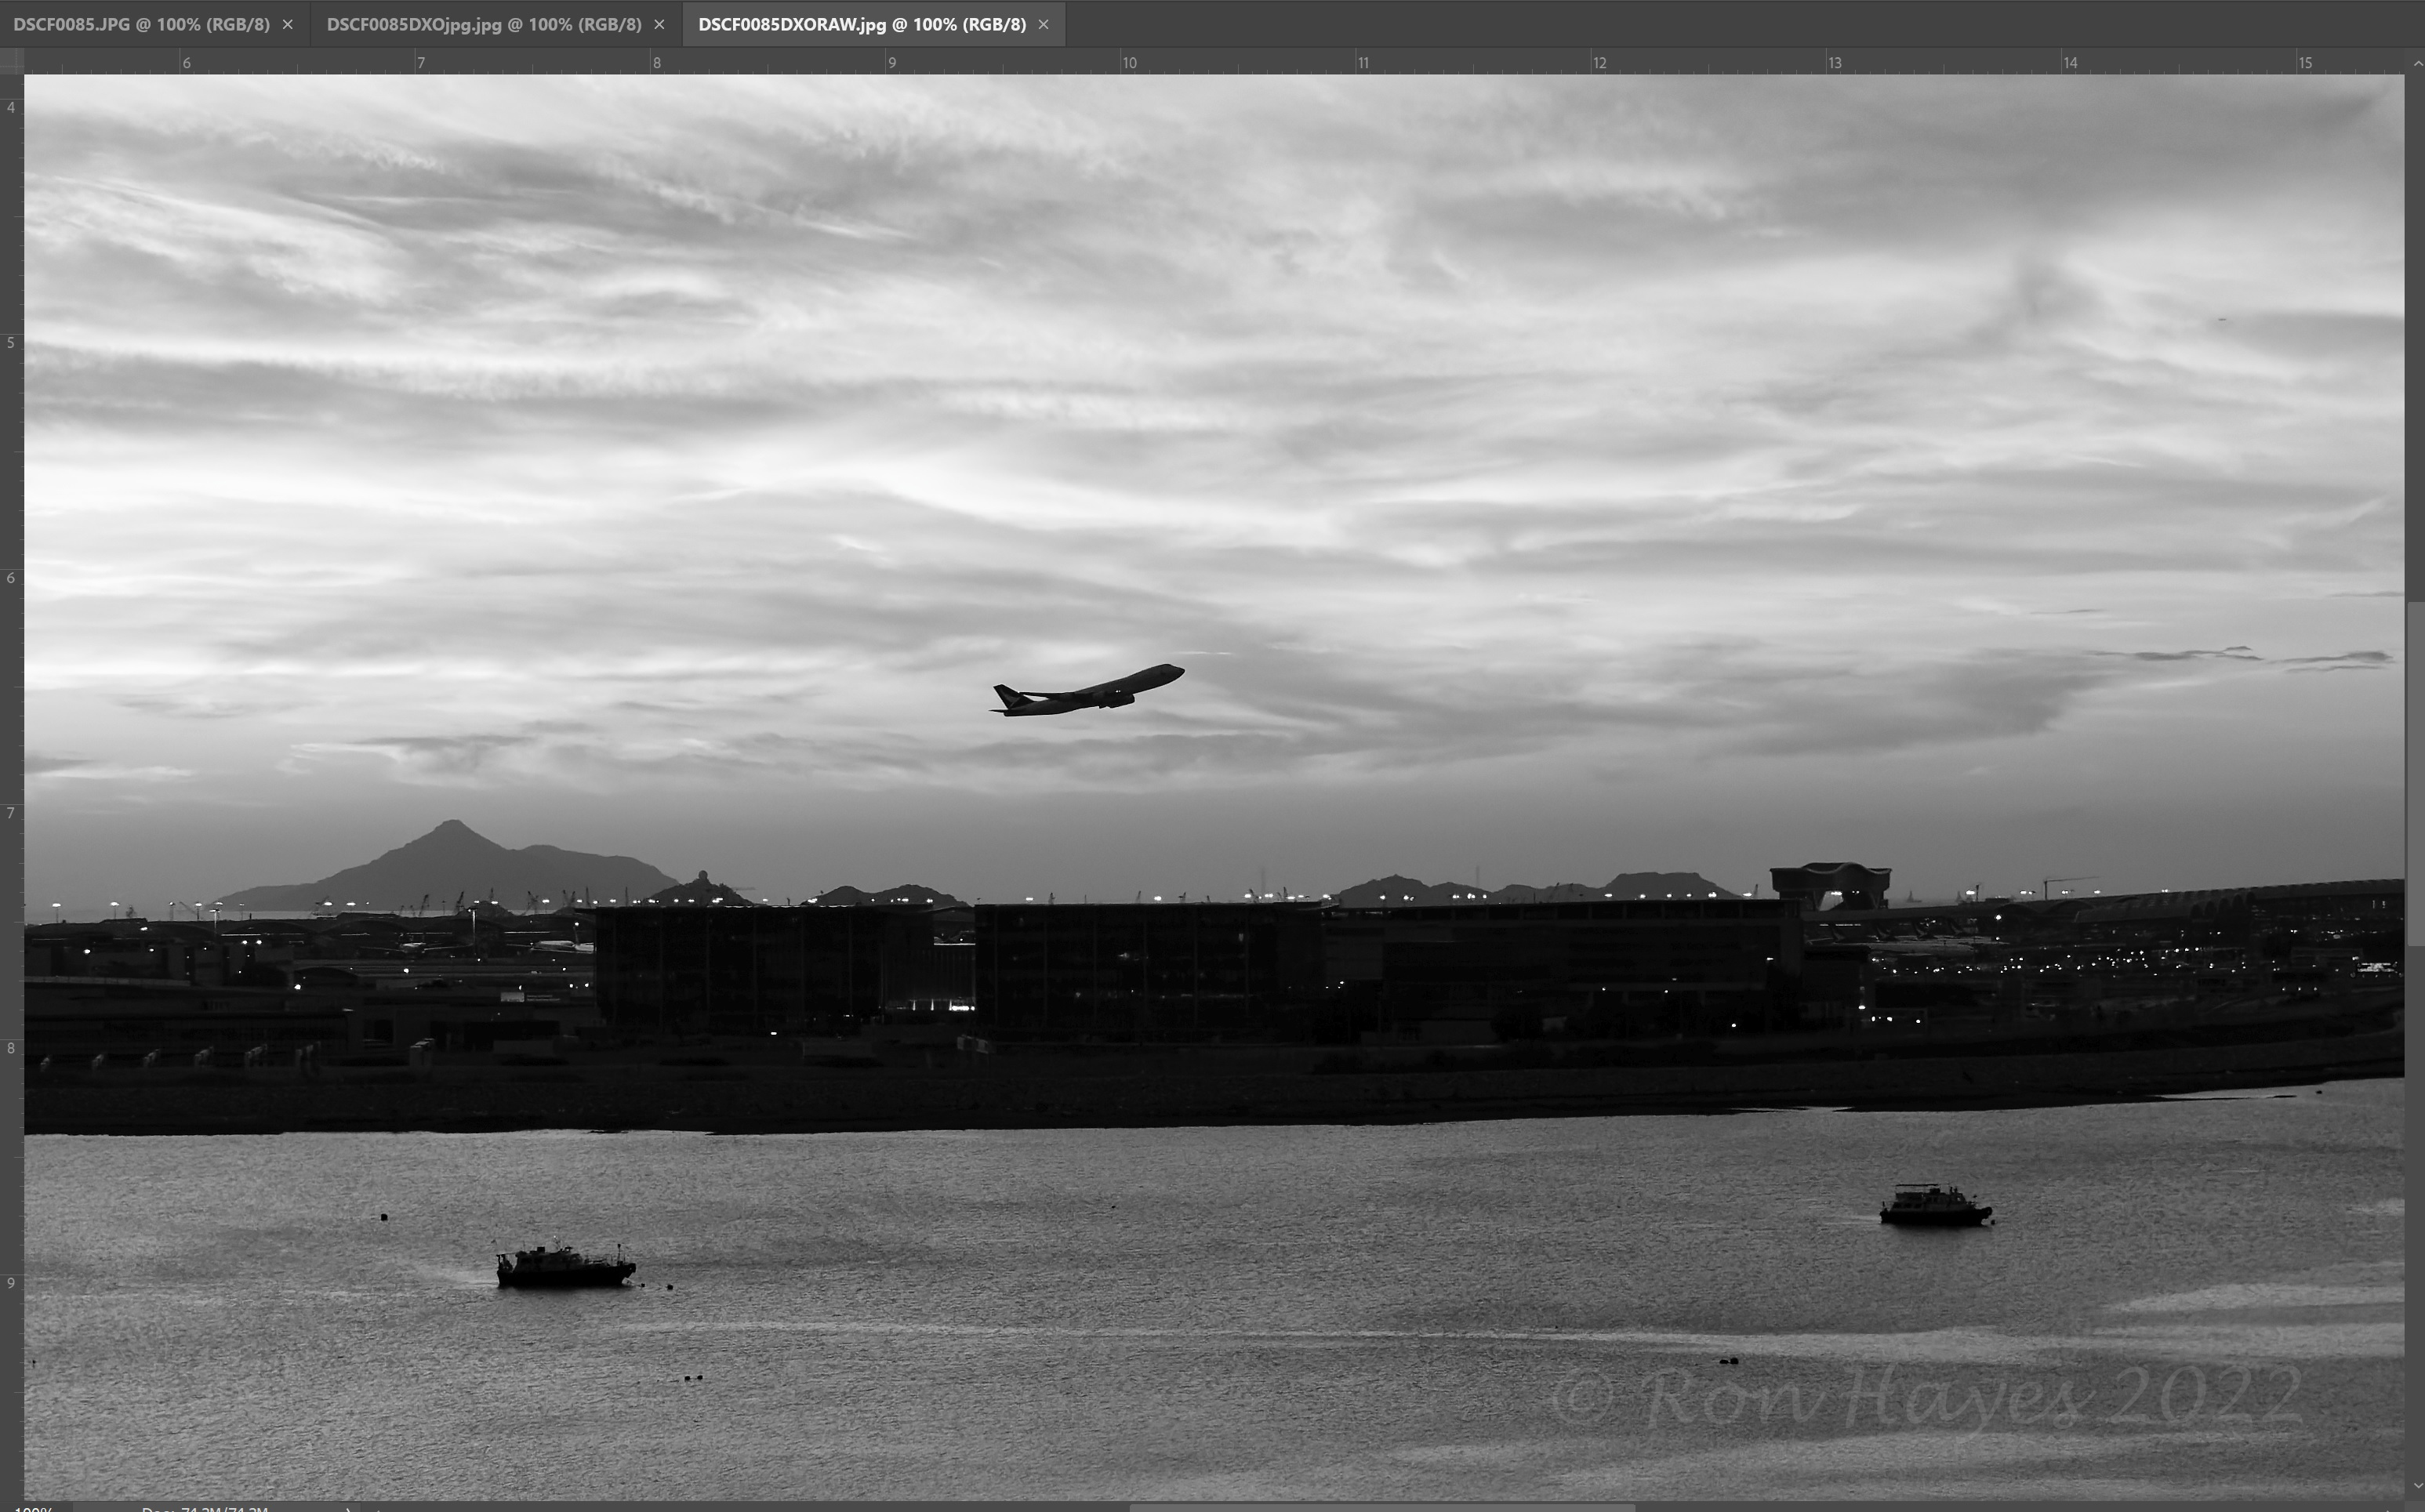
This is the image from the camera as it was framed. This happens to be the RAW edit and not the JPG BW but that is next at 100%.

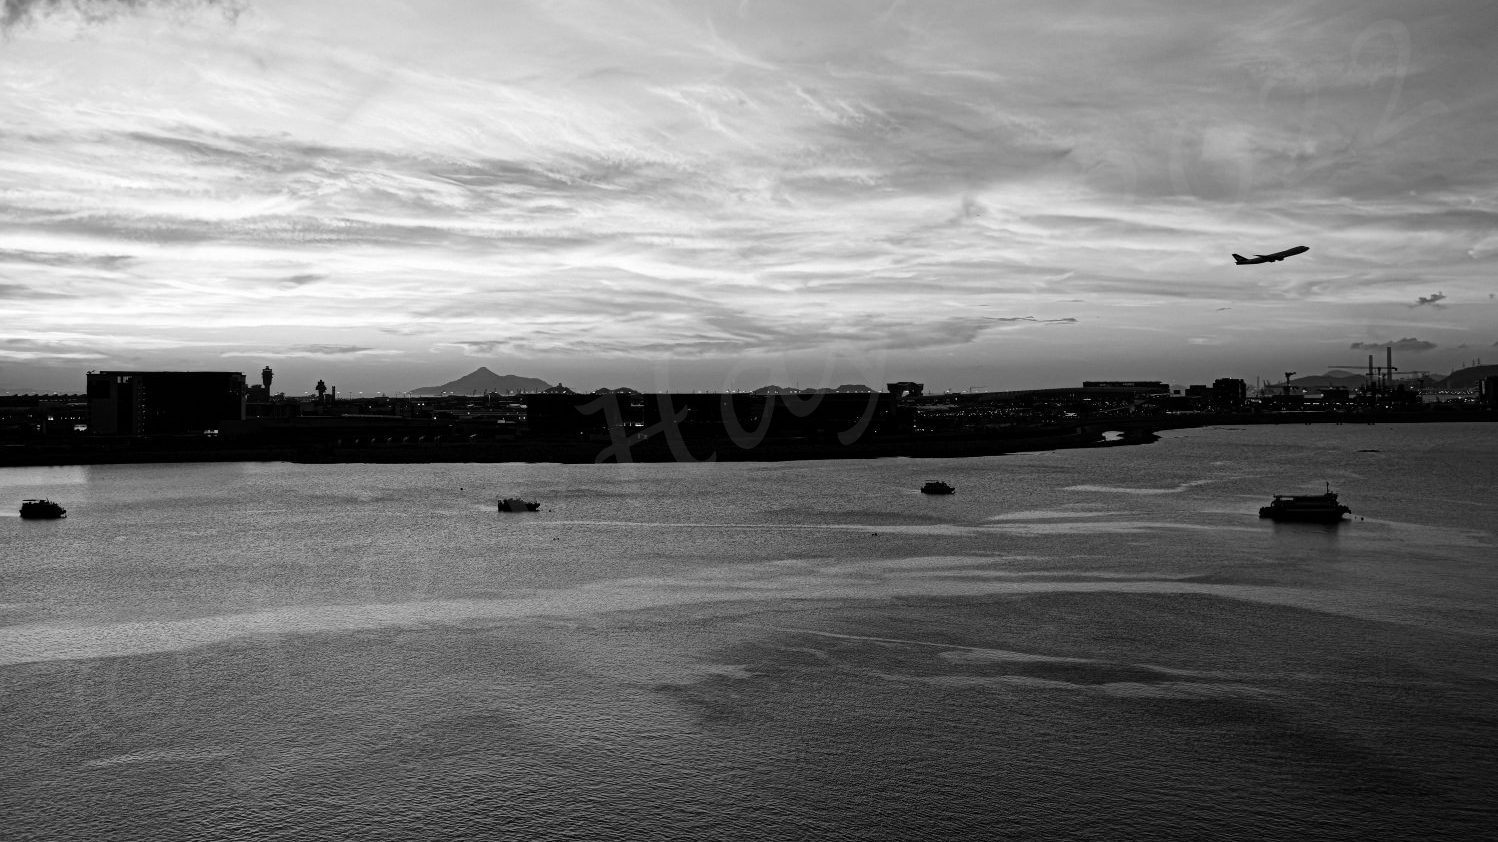
So as the caption said this is the JPG image taken from the camera using the cameras Fuji Film Simulation. I did not add any modifications to this image. This image has a great texture which if printing in at a “consumer” size, not larger than 8×10, I would be more than happy with. It has a slight “noise”. Now lets look at the same image at 300%.
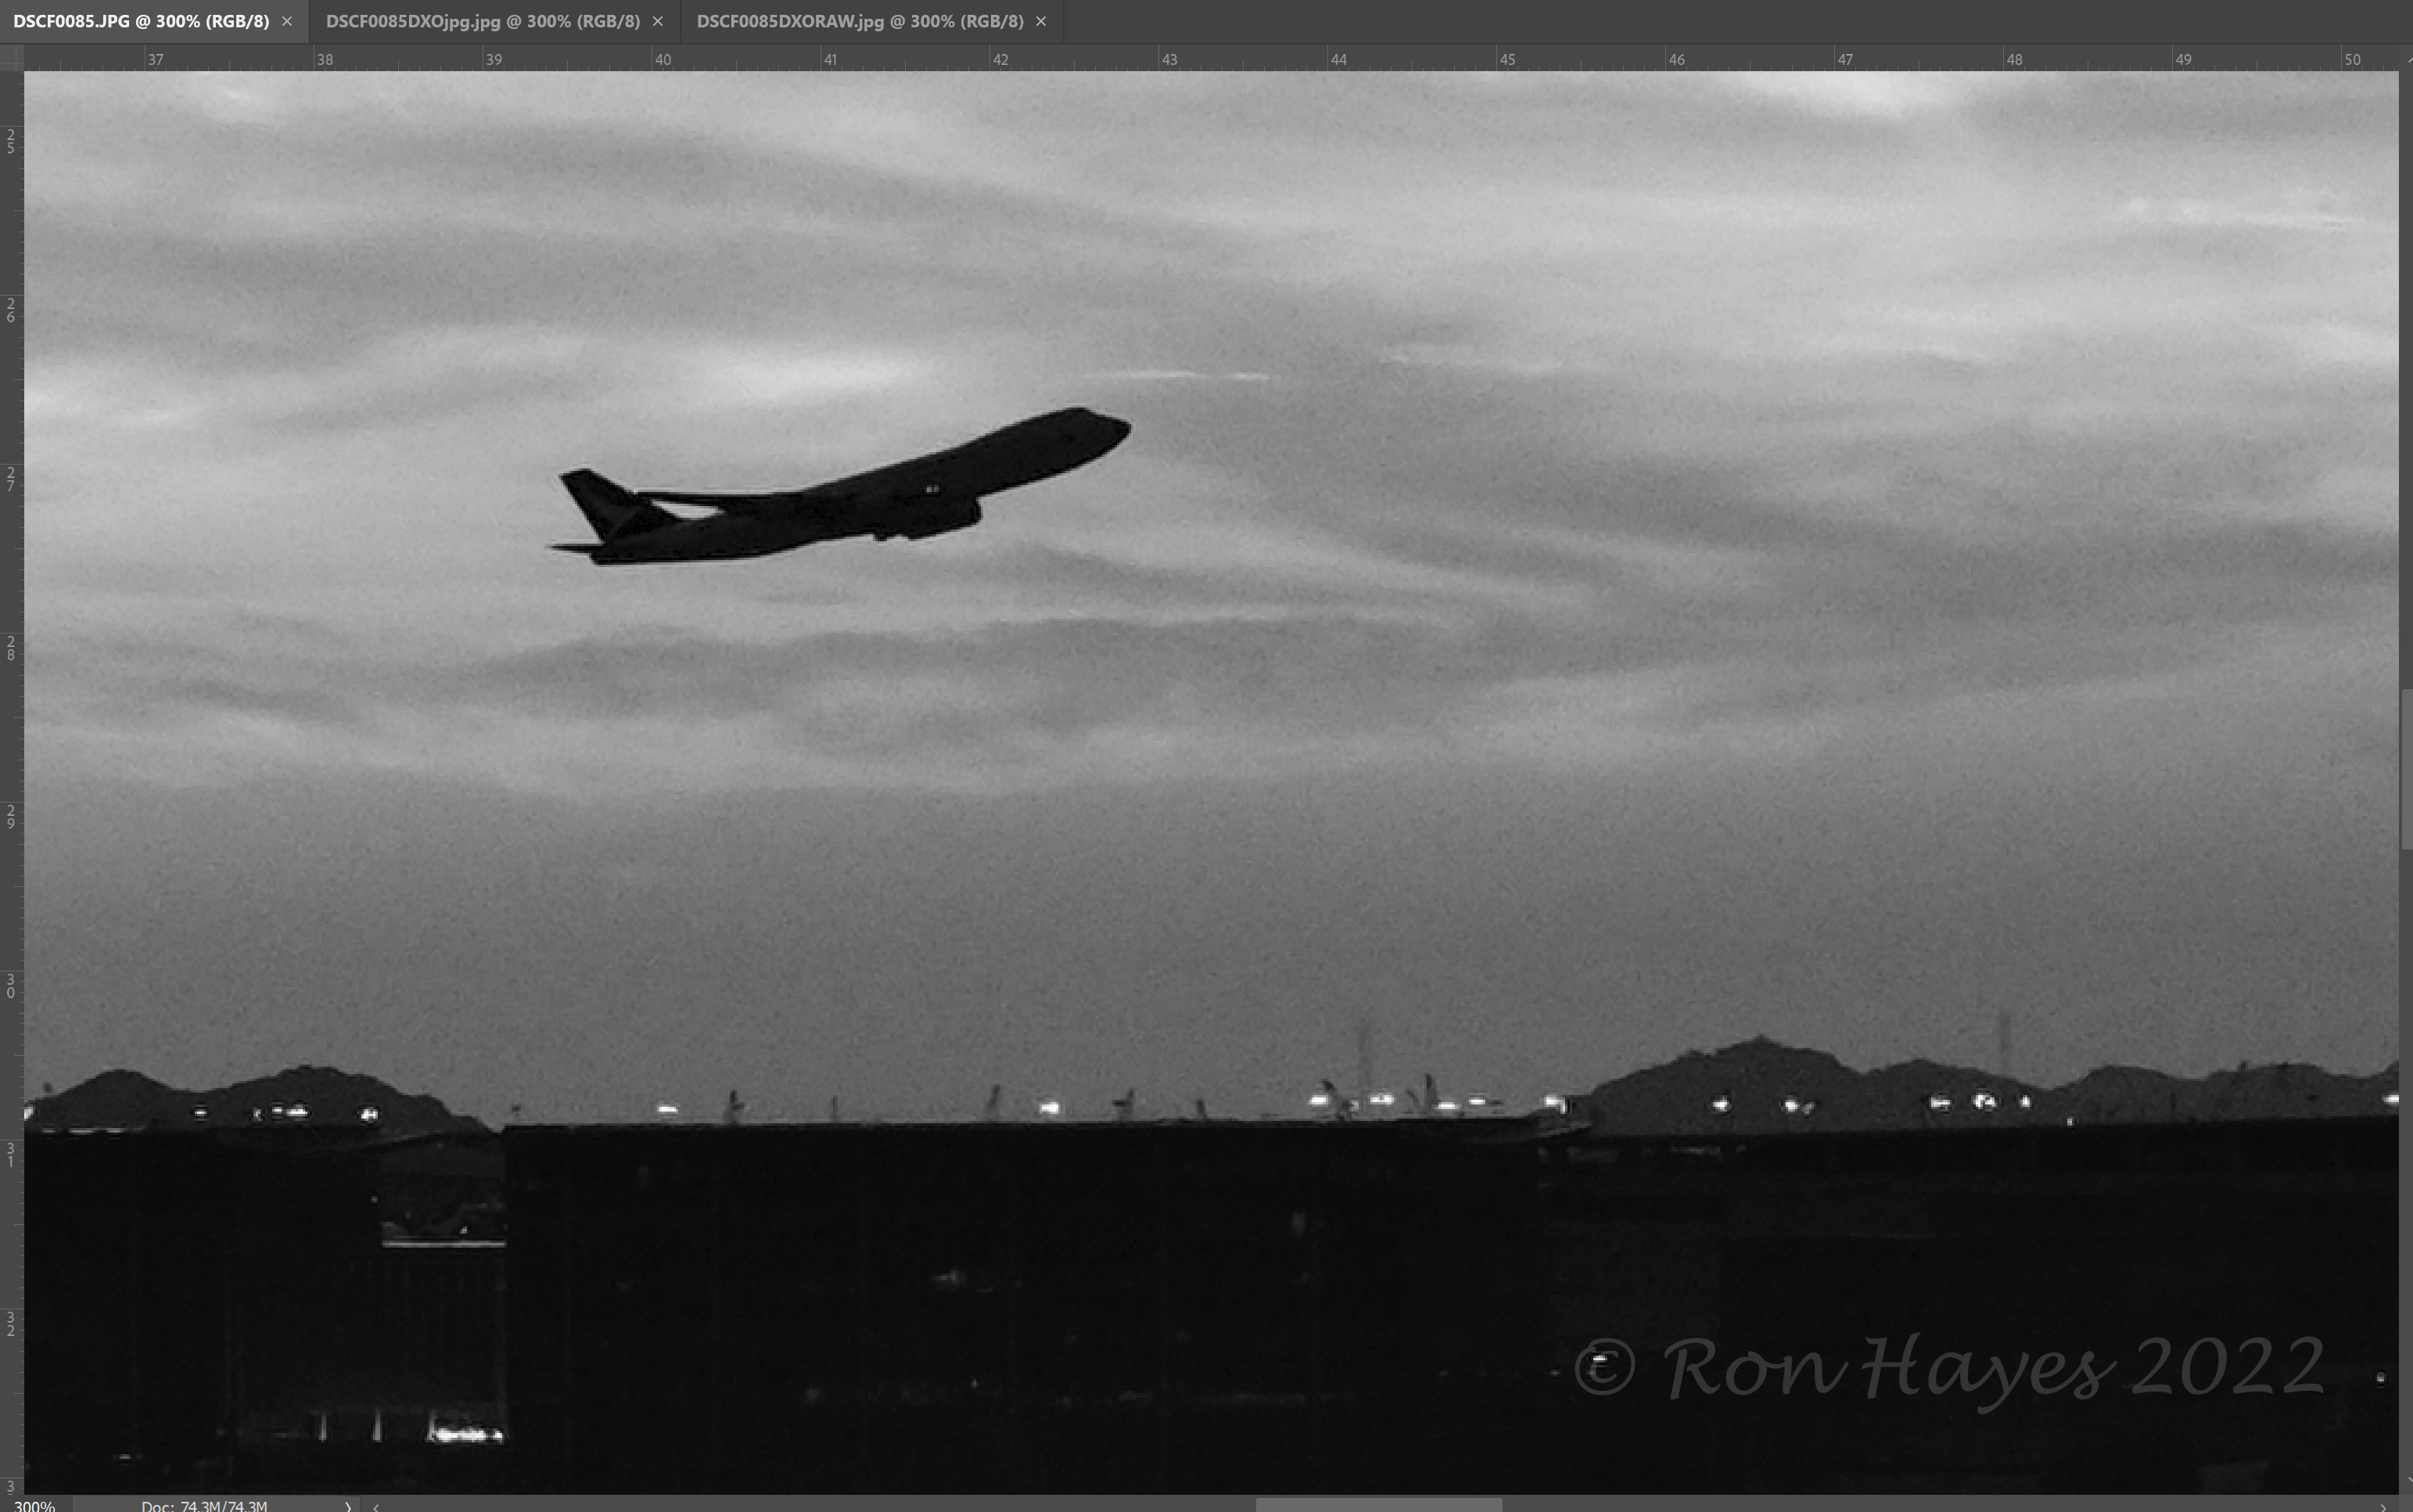
When we get into 300% the noise in the image in the sky is pronounced. This is a clear indication of what the noise looks like often in a ‘camera’ JPG. Don’t worry I will add a slider gallery so you can compare once you have looked. But in the interest of content awareness and impact of statement. Lets look at the same image as a RAW conversion also cropped to 300%.
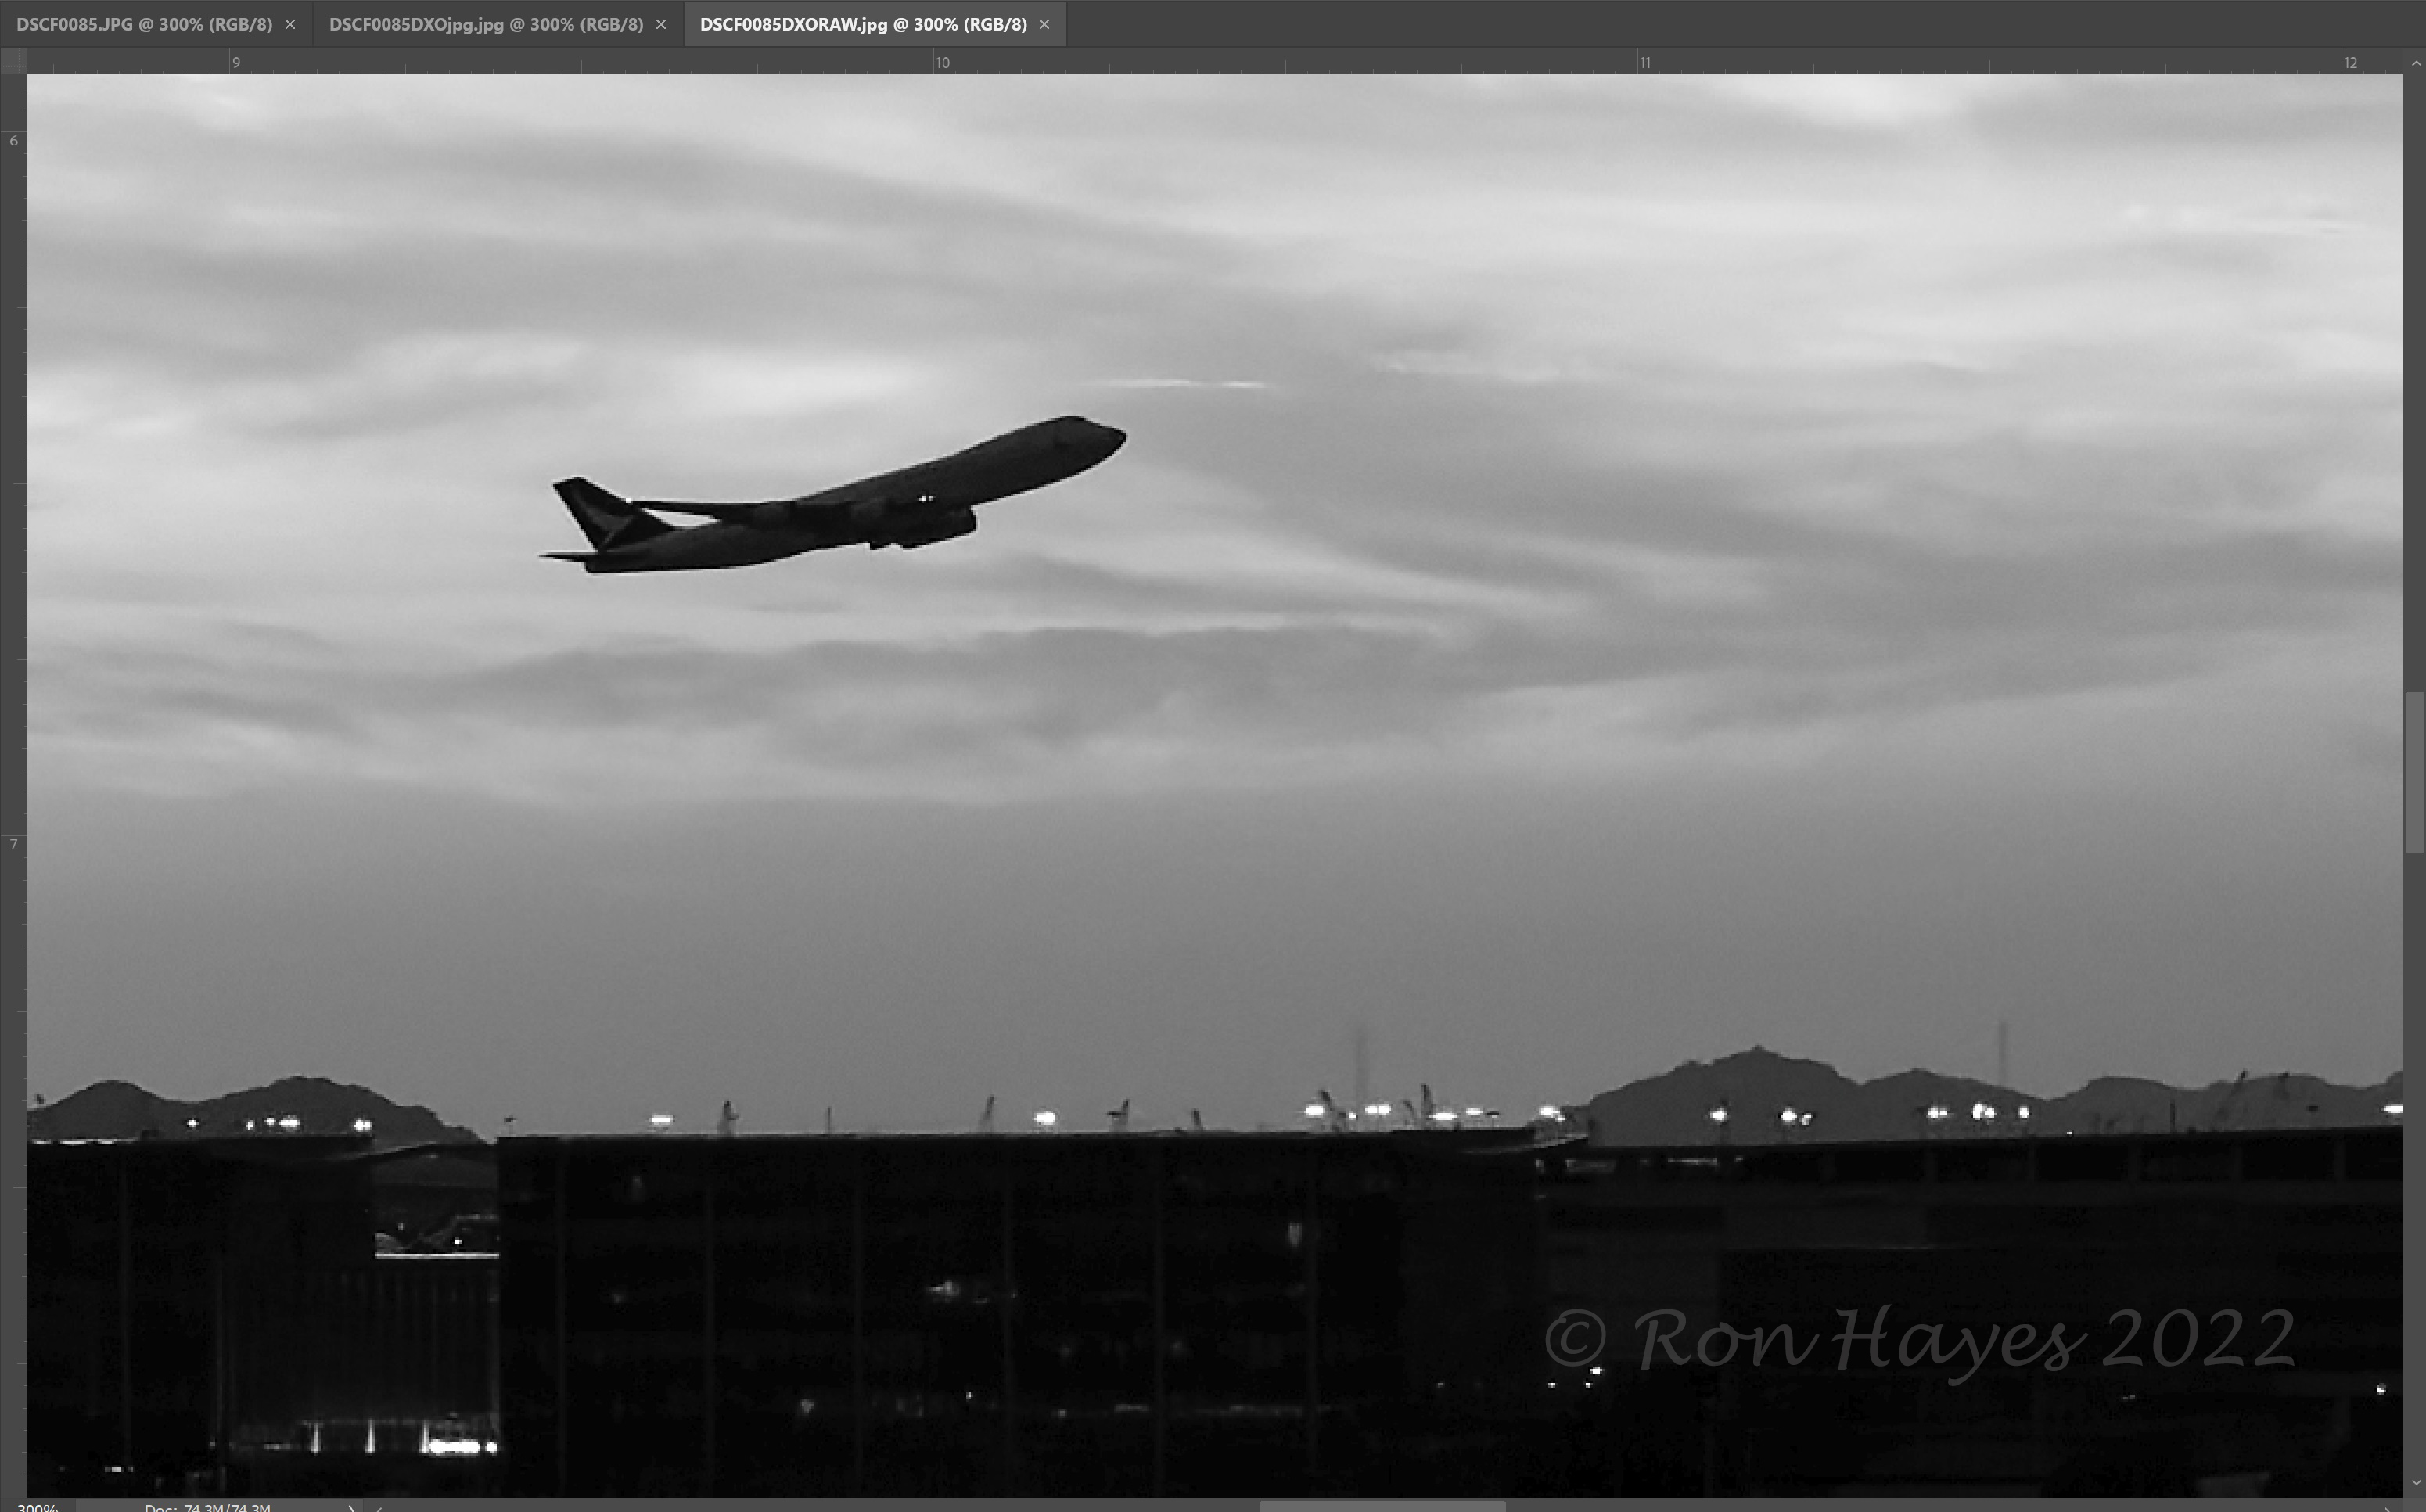
As you can see there really is no question that the image that was processed from the RAW file is exceedingly clearer. There is virtually no noise in the sky in comparison to the 300% ‘camera’ JPG crop. It is worth noting additionally that there are some subtle areas of improvement which are beneficial as well. If you look at the tail of the aircraft in these images above you will see that the logo in the ‘camera JPG’ is not very noticable where as in the RAW conversion it is something that you can make out much better.
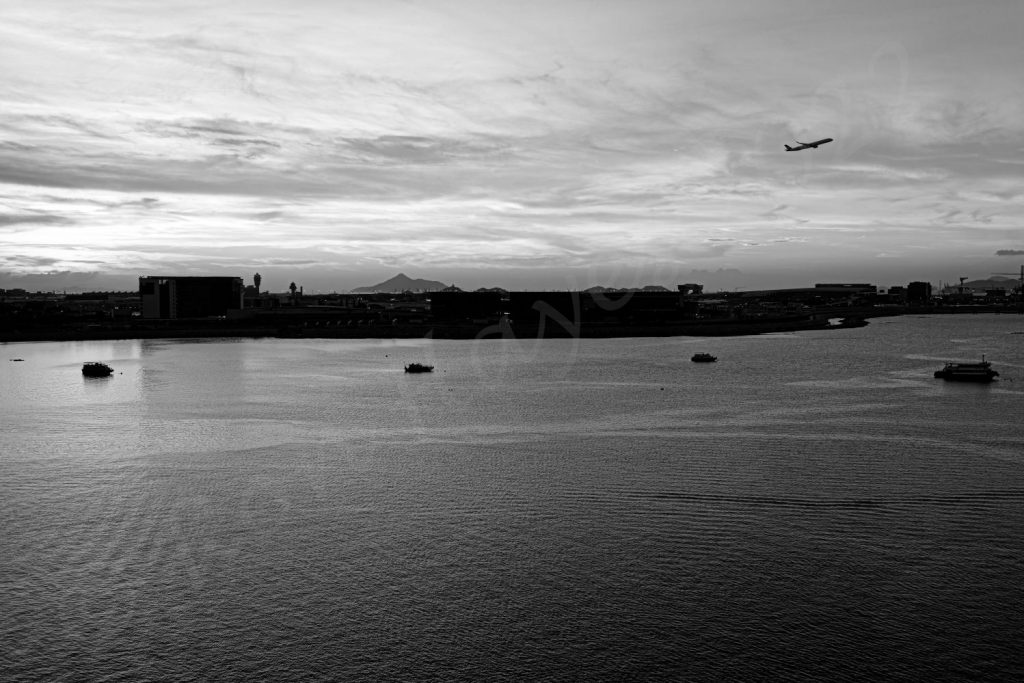
This is what the RAW conversion looks like when it was at 100% crop.
Click on any image below in the gallery and it will open a slide gallery which will make image comparison easier.


Summary Opinion
Not that my opinion matters but in summary the RAW image conversion produces a cleaner image which will lend itself to better prints at larger sizes. I work RAW as I have stated almost exclusively and would be more than happy to print my photos for gallery sized ‘super’ prints or my stock gallery ‘bill boards’.
Last caveat: These images were from my new camera the Fuji X100V and I was running the JPG as a ‘Film Simulation BW’. It is possible that this simulation added additional noise into the images.
The note above with regards to ‘camera inserted noise’, I did an additional test to confirm this and the camera definitely added some film based grain and subsequent noise to the images. The closest that I can get in this camera is “PROVIA/Standard” which is meant to be the standard option. It is interesting to note that with this camera that I can see there is no option to shoot a JPG without any ‘simulation’. I am putting together a different article do demonstrate the different ‘film’ types from the Fuji Lineup and plan to update that later today.
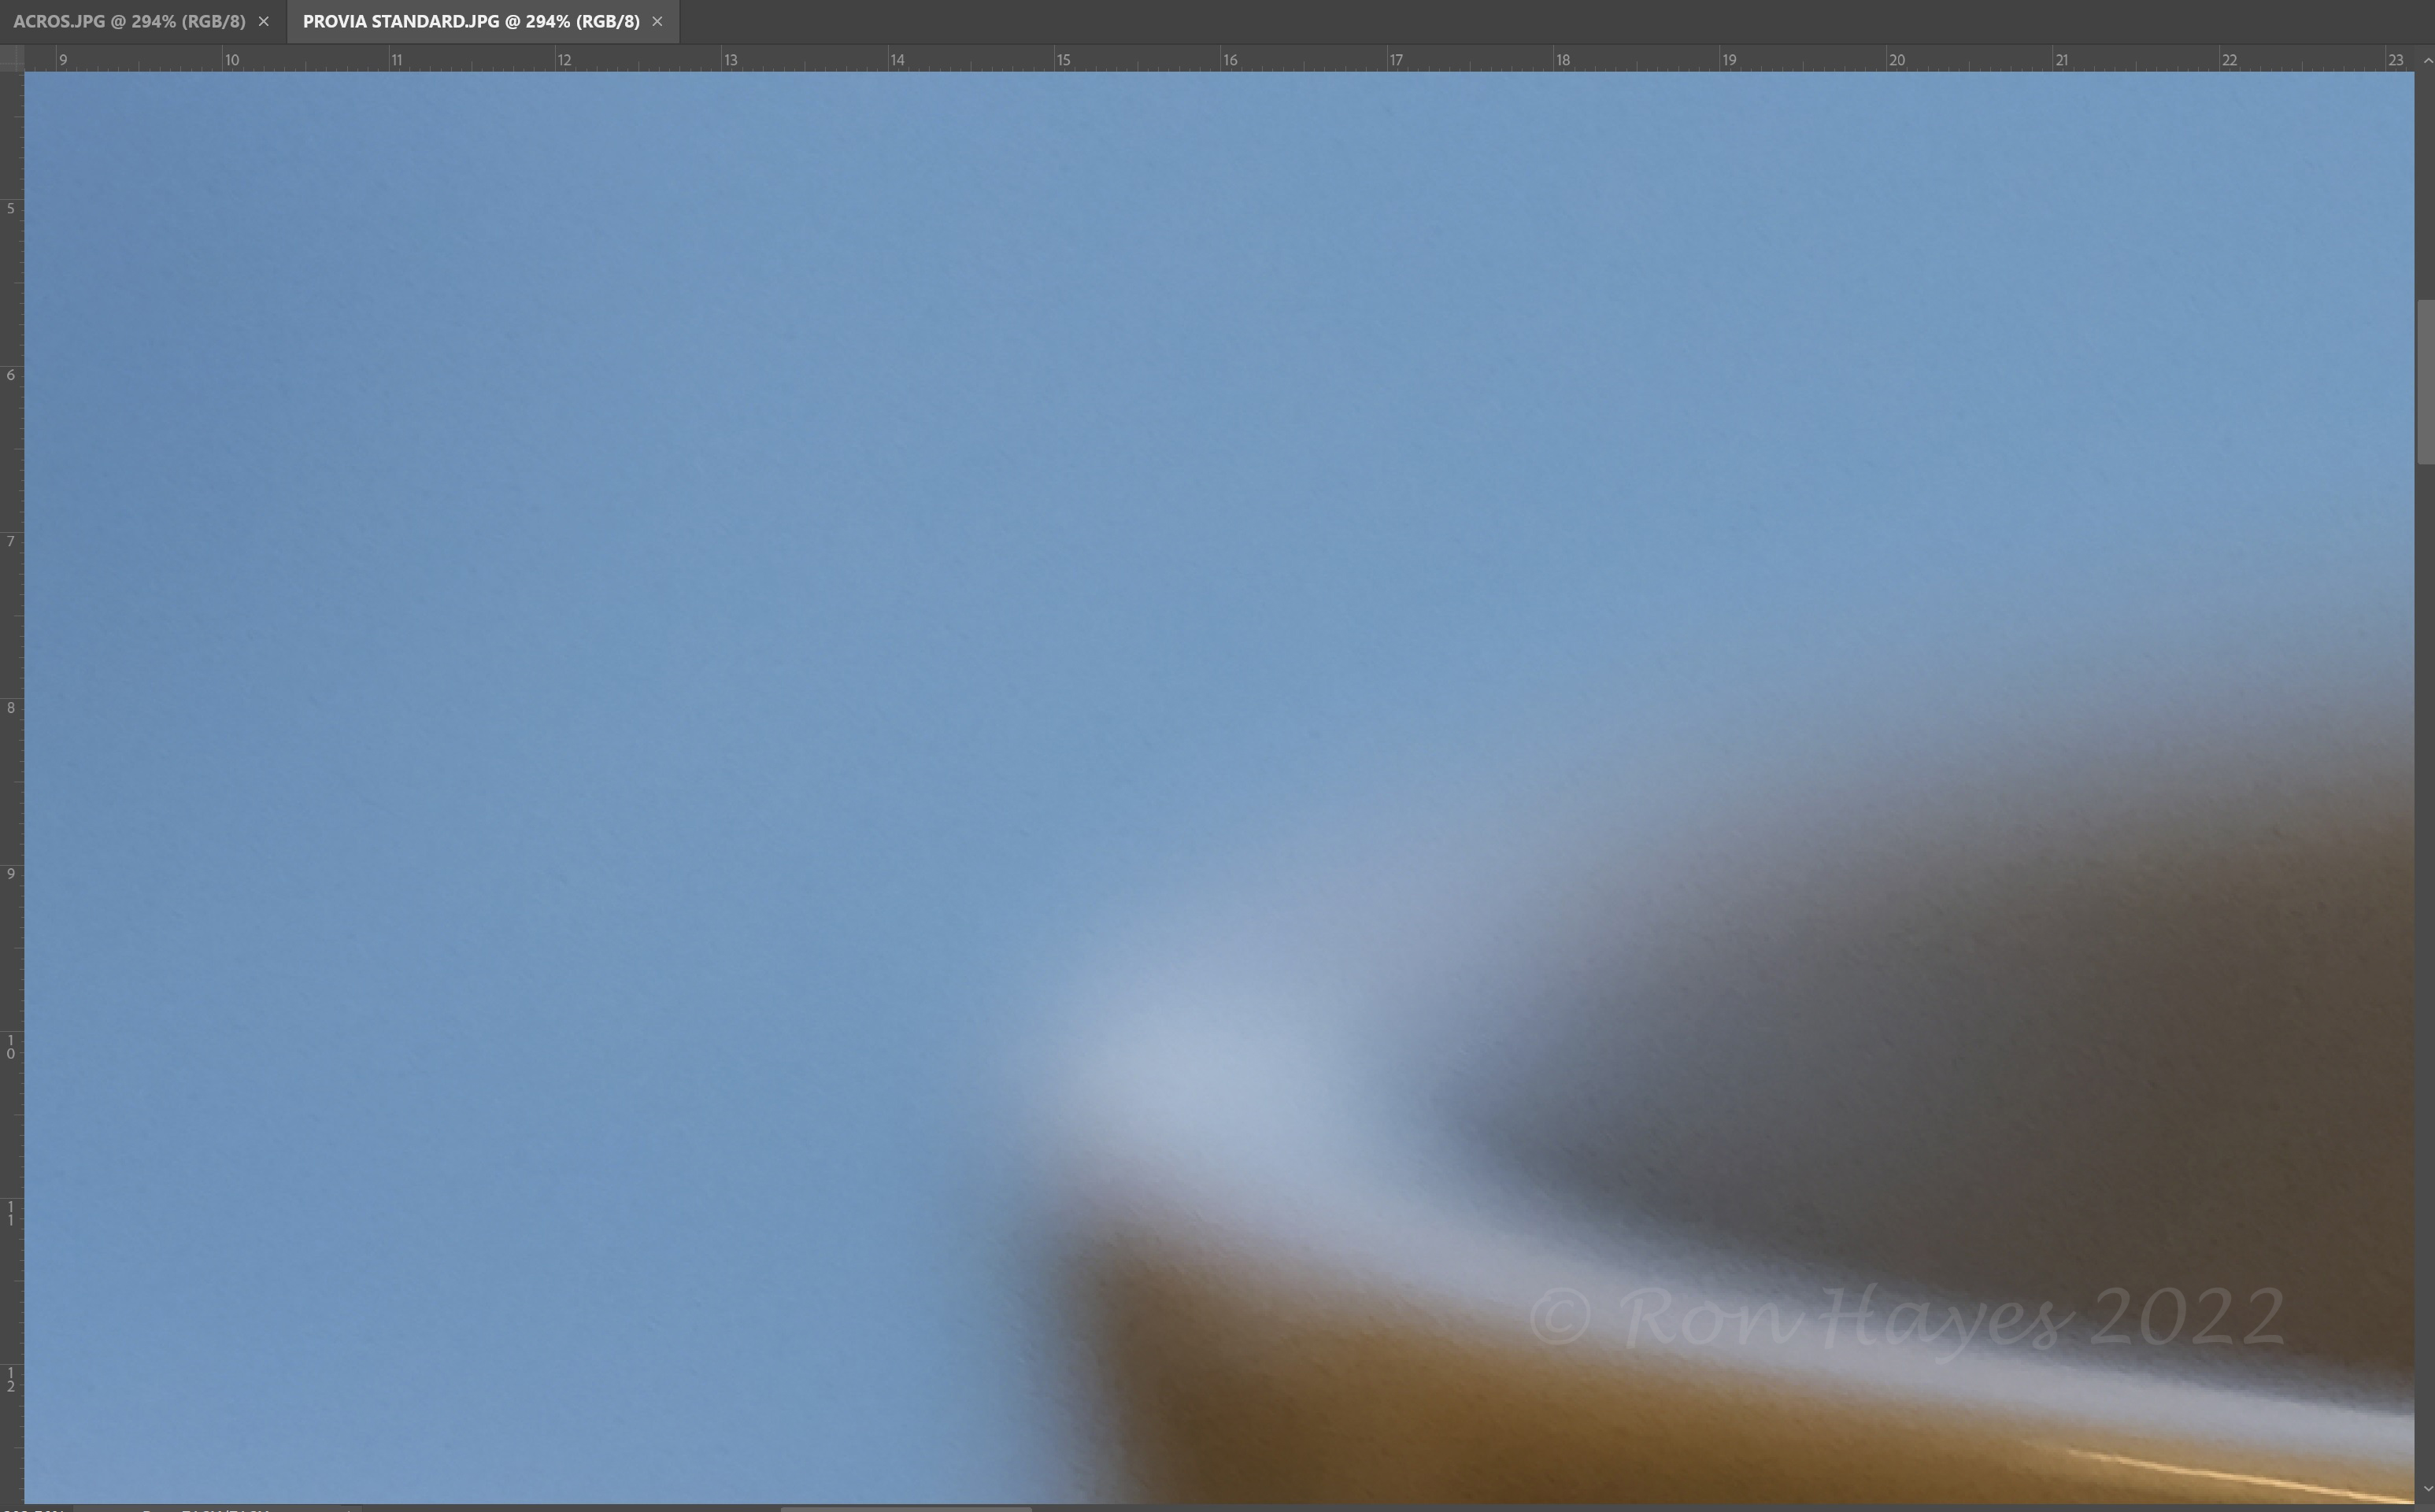
The PROVIA is a nice looking JPG and below is the ‘similar’ image shot with the previously used ACROS BW Film Simulation which is used above in the article.
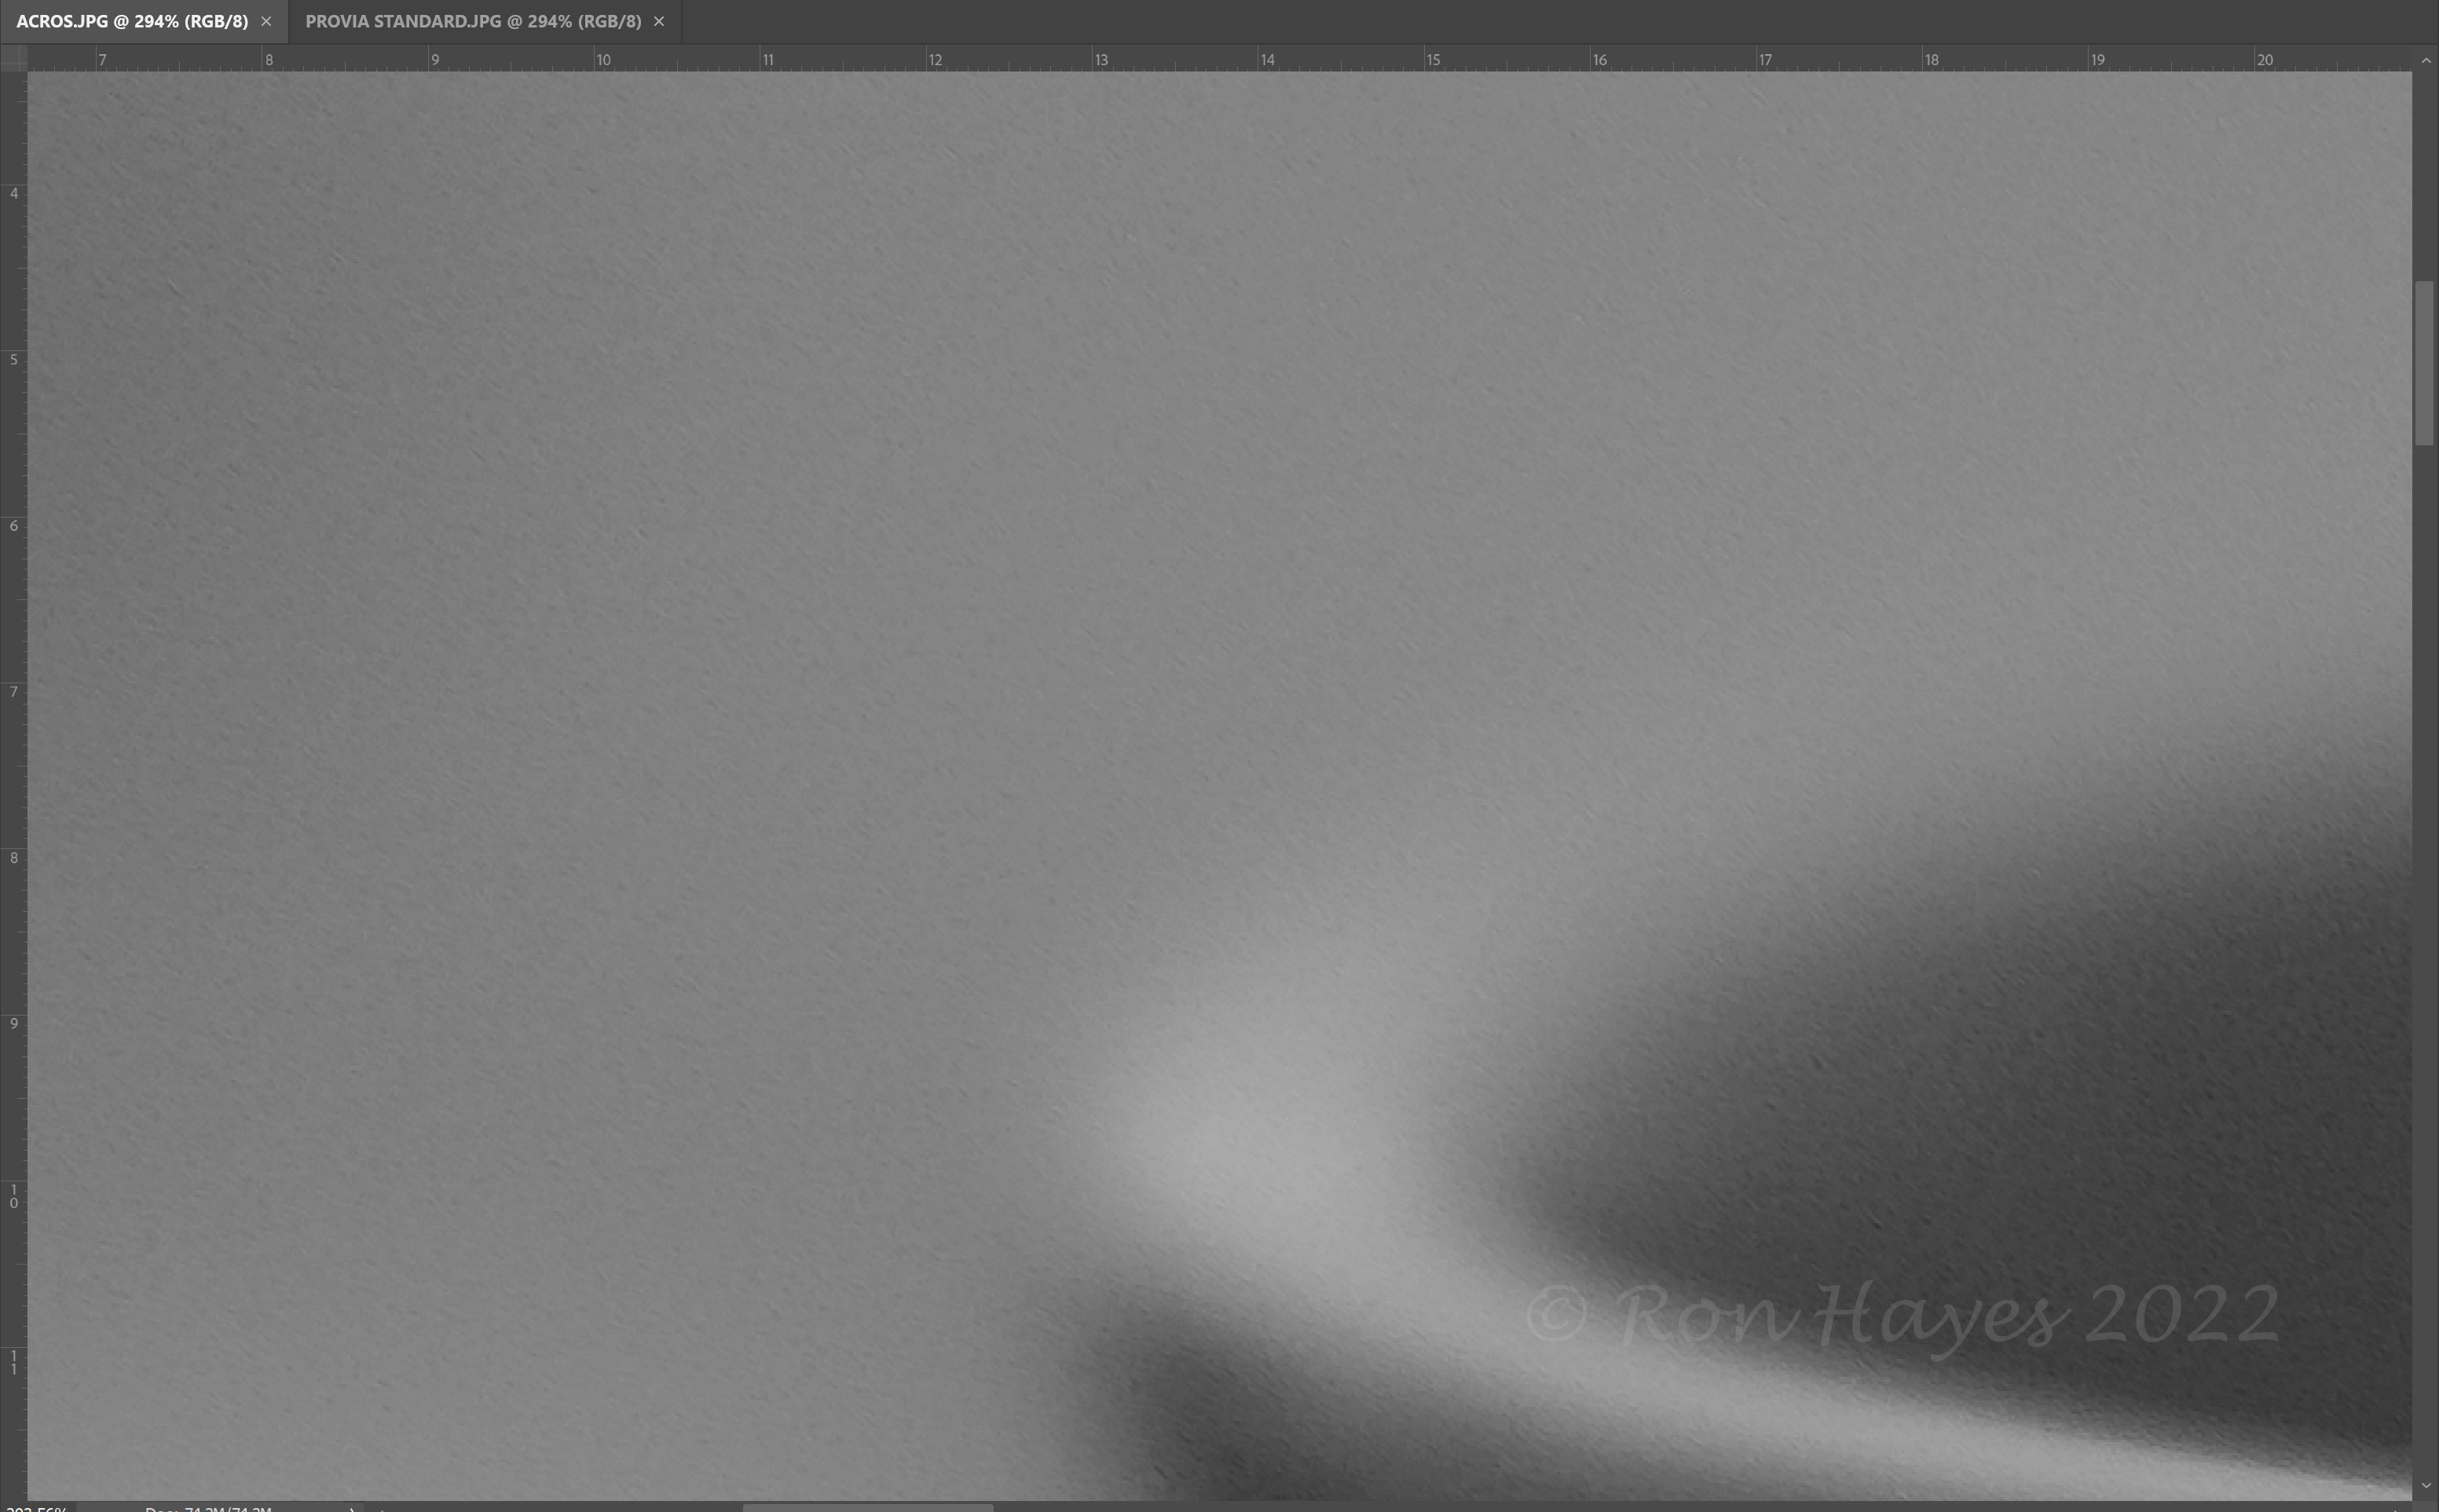
So comparing these two images you can see that ACROS does add some grain and noise. The RAW edits of the above two images will follow.
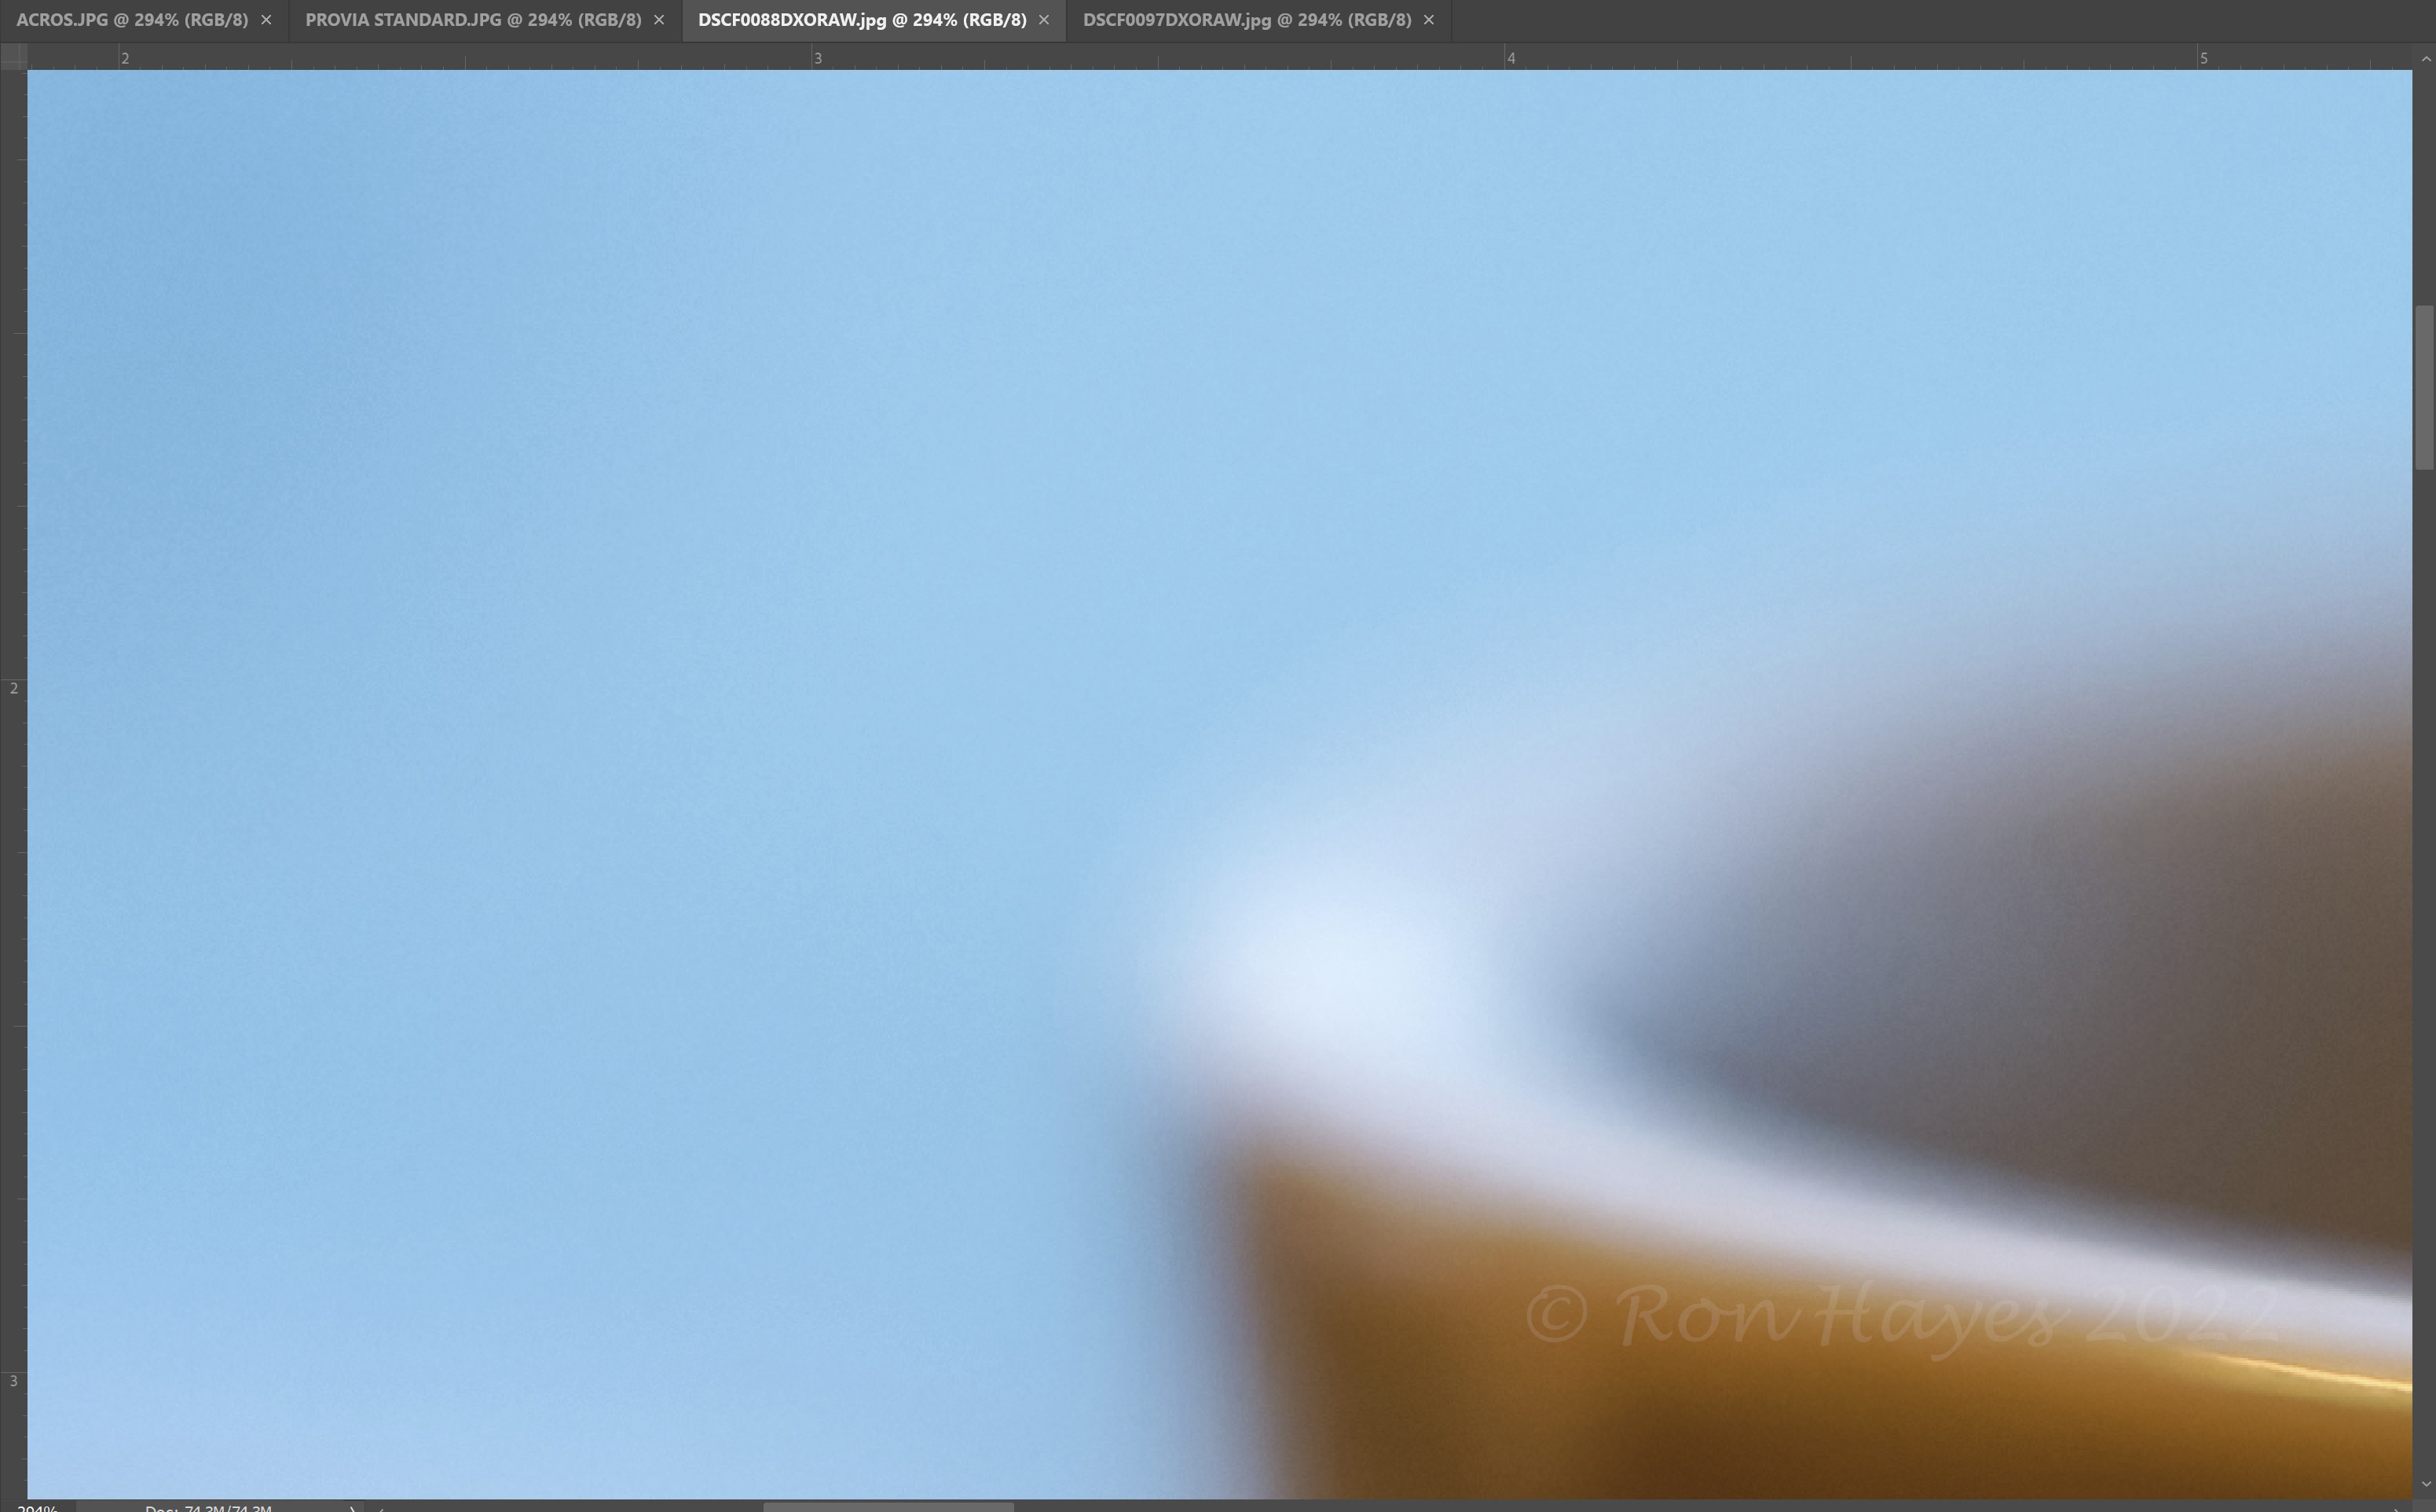
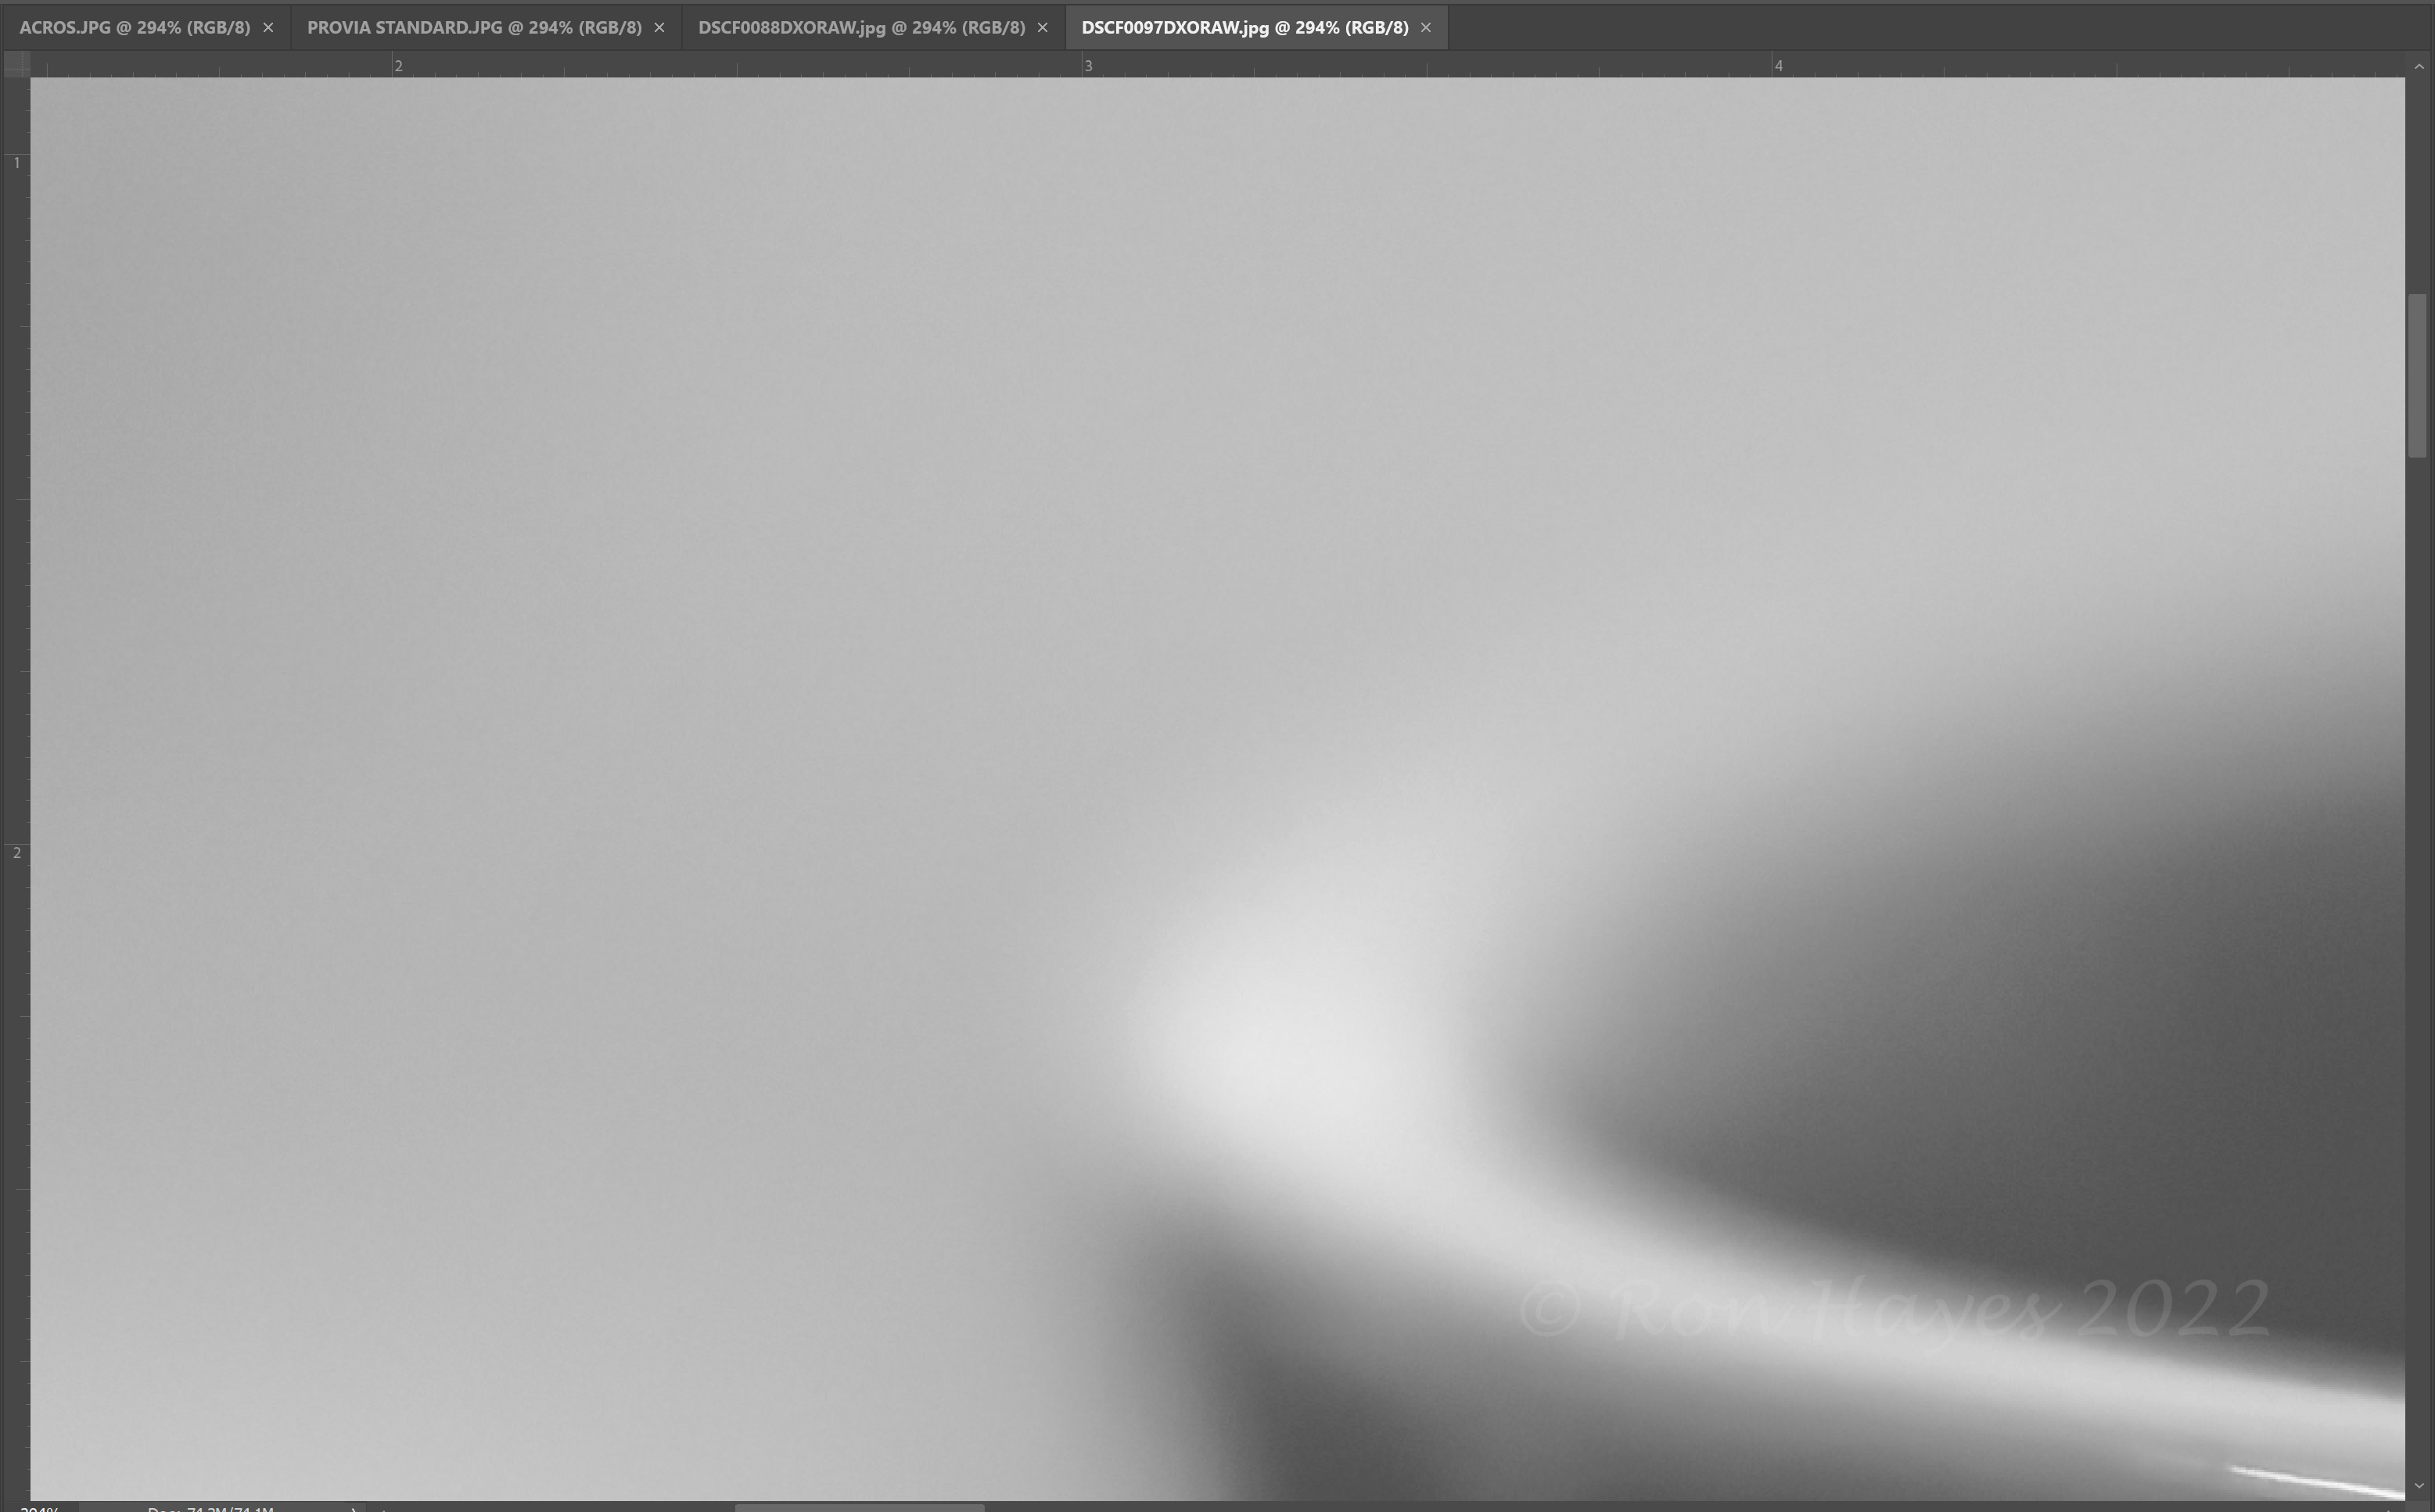
As expected the RAW image conversions are nearly identical in noise and this is as you would expect because it is taking any noise out of the image from the RAW state. Although Fuji has somehow tagged the film simulation so that it ‘shows’ on the image in my RAW converter the noise profile is removed comparably. Both of these RAW conversions were a simple selection of the noise filter on and produce. I did not have to select anything other than the defaults for the photos and even the BW was automatically showing as you see it, tagged with the JPG info from camera.